Quickstart
Turnkey is a secure, flexible, and scalable piece of crypto infrastructure that allows for programmatic management of cryptographic keypairs and signing of crypto transactions. The guide below will walk you through Turnkey's onboarding, and using Turnkey's SDK to programmatically create a wallet and sign your first Ethereum transaction. It will also walk you through a common flow for creating a non-custodial wallet on behalf of another user, and having that user sign their first Ethereum transaction using a passkey authenticator.
Create your Turnkey Organization
- Visit app.turnkey.com/dashboard/auth/initial and enter your email address
- Confirm your email by clicking on the link inside of the confirmation email
- Follow the prompts to add your first authenticator and create your organization
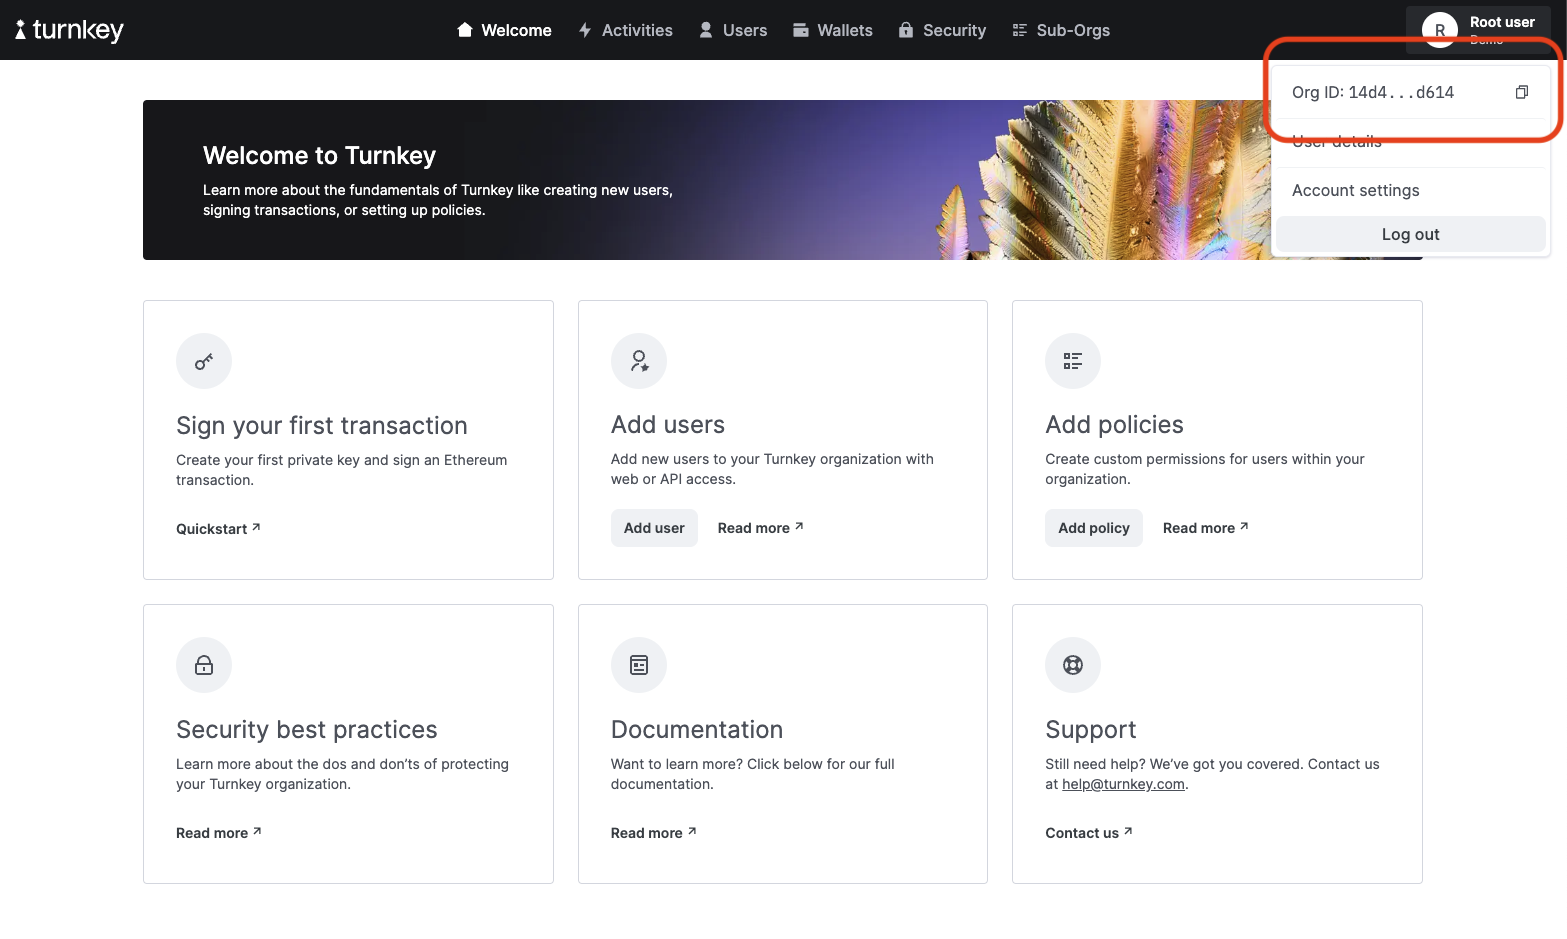
You can find your newly created organization ID in the user dropdown menu at the top right corner of the dashboard.

You'll want to reference this in your code or as an environment variable, as you'll need it to make requests to the Turnkey API.
Create an API Key
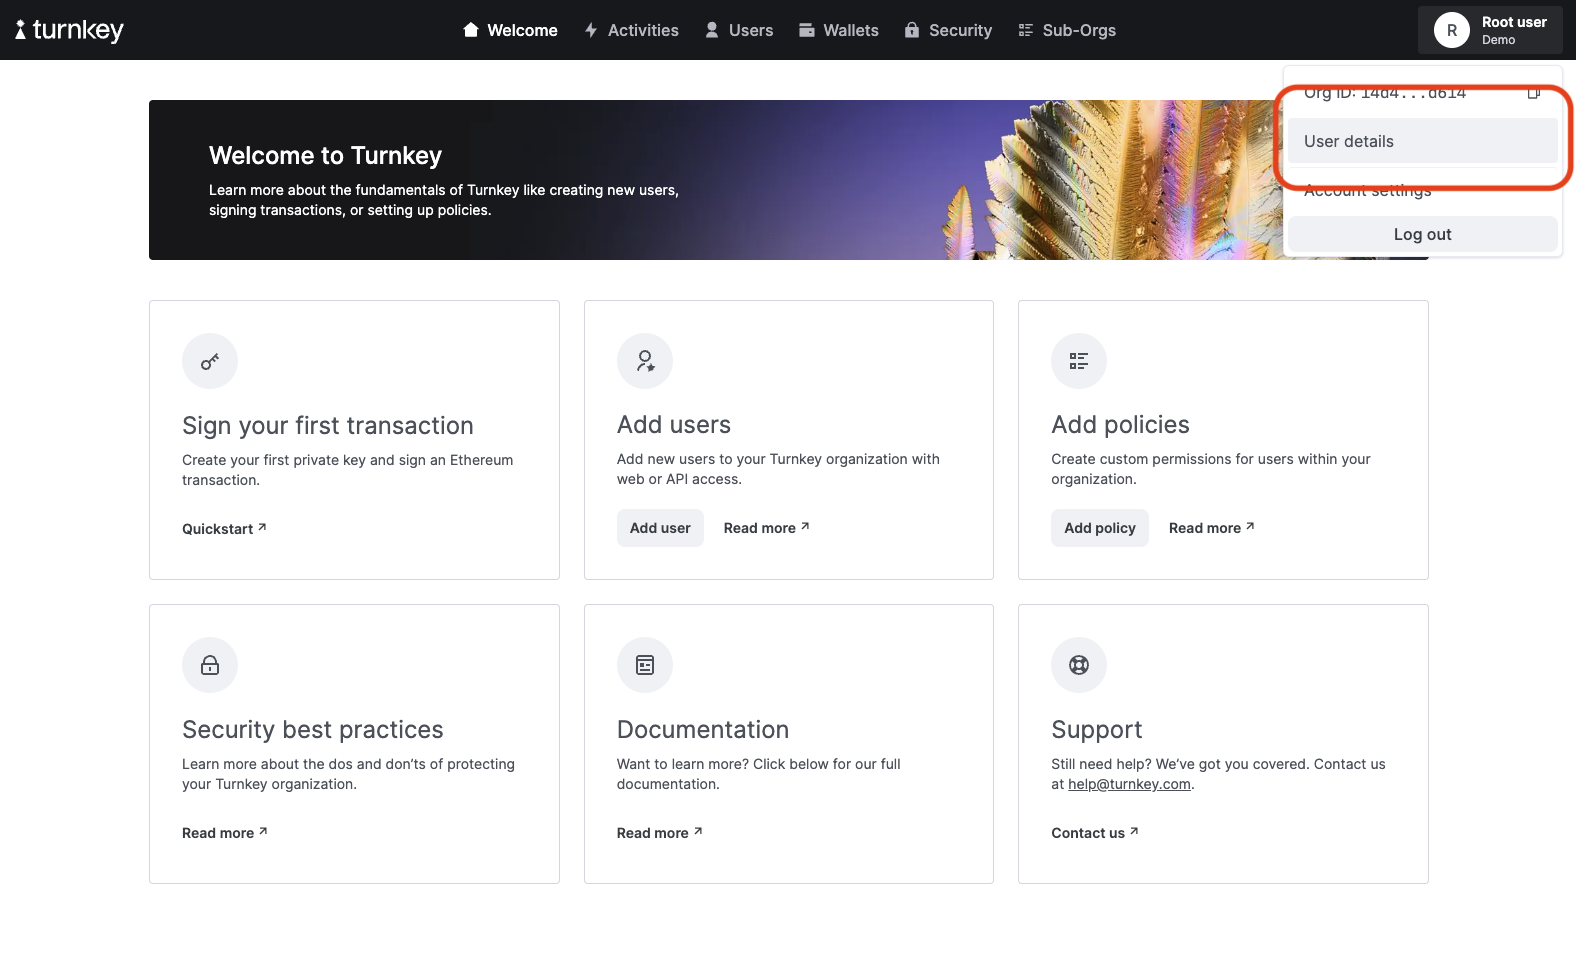
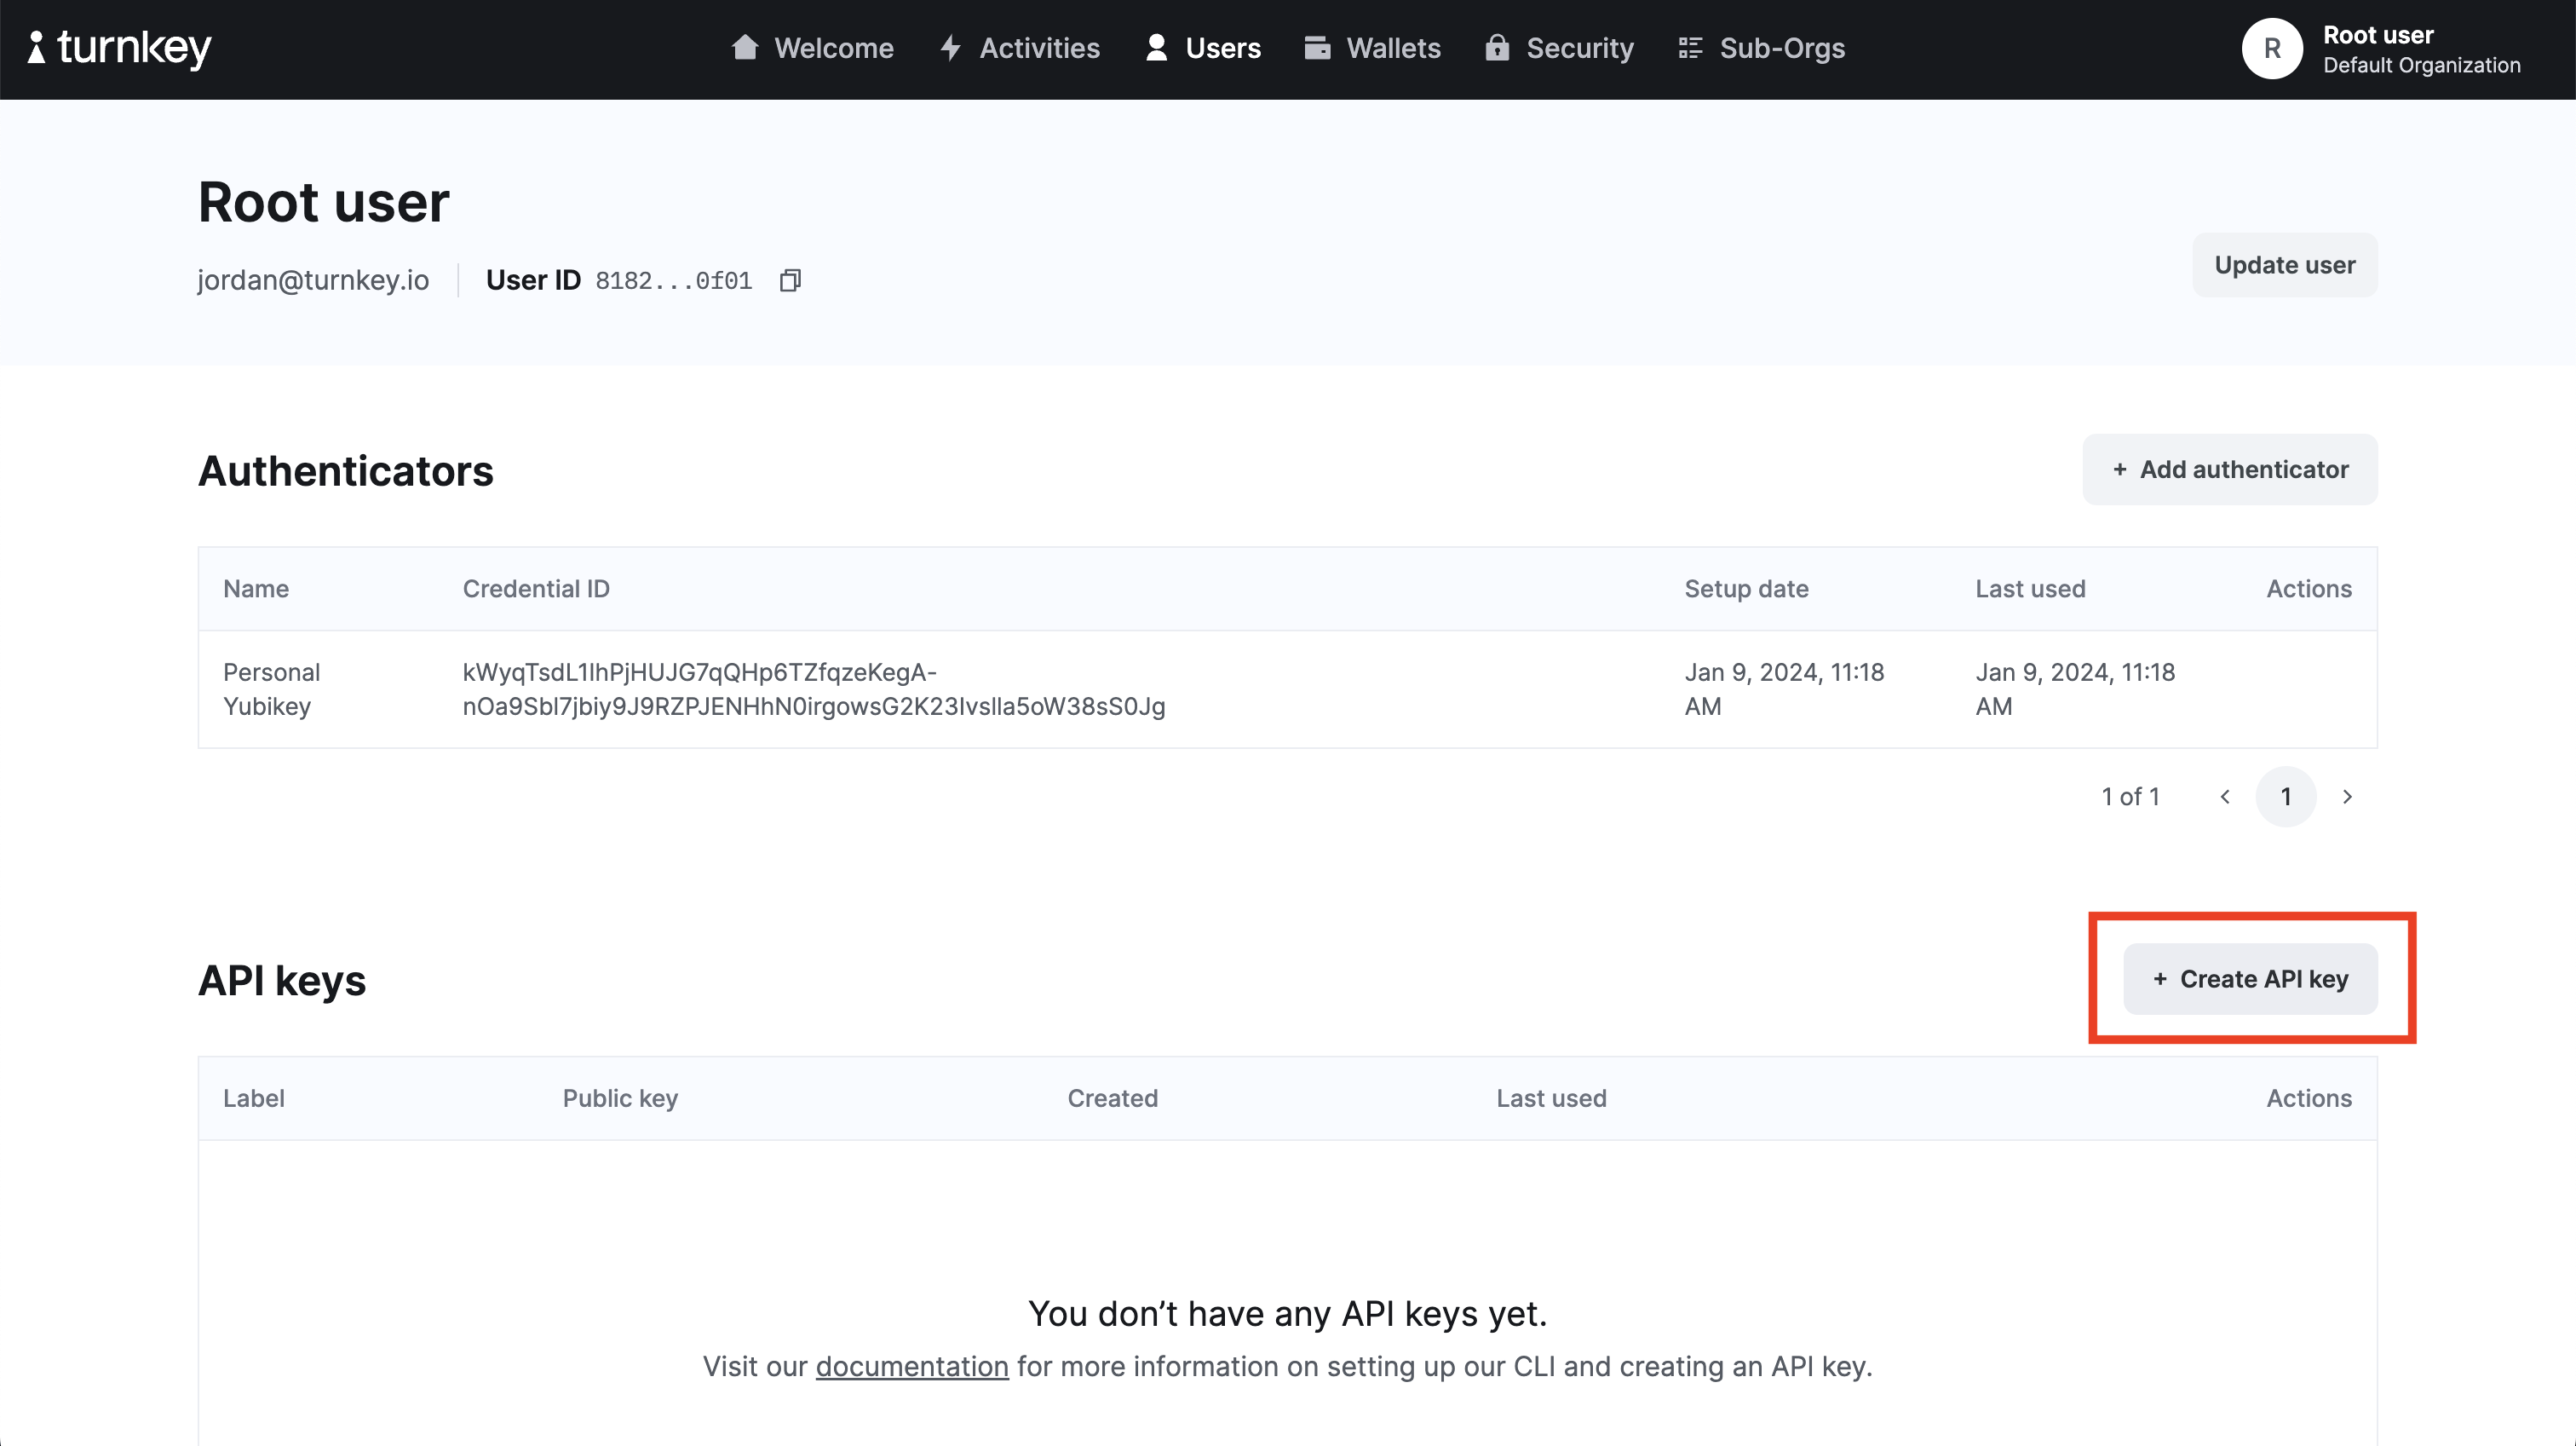
Turnkey API Keys consist of P-256 public / private keypairs that allow you to make authenticated requests to Turnkey's API. You can create an API Key from your user page of the dashboard. Navigate to your user page by clicking on "User Details" in the user dropdown menu, and then click "Create an API key".


- Select "Generate API keys in-browser" and click continue.
- Give your API keypair a name and click continue.
- Save your Public and Private Key locally.
- Make sure to click "Approve" to sign the API Creation activity with your authenticator device.
A couple of notes on the action you just took:
- Every action on Turnkey returns an
activity, including creating the API keypair in the previous step. You can read more about the full Turnkey Activity Model here. - The keypair you just created is an authenticator for the root user of your Turnkey organization. Any code using an API keypair for the parent organization should only ever be used and stored securely server-side, and never exposed to end-users.
- You will need both the public and private key to sign requests to the Turnkey API.
Instantiate Turnkey using the Server SDK
The simplest way to use Turnkey's API is through one of our SDK libraries. This example will make requests to the API using our server-side node.js library. You can see the full list of client libraries supported on our SDK Reference page.. Additionally, if you're looking for an example to get started, here are some fullstack Next.js apps that use Ethers and Viem, respectively.
Installation
- Yarn
- NPM
yarn add @turnkey/sdk-server
npm install @turnkey/sdk-server
Initialize an apiClient
There are multiple ways to authenticate a request to Turnkey's API. The apiClient is how you make requests using a public/private keypair (like the one you created above). The apiClient needs two additional parameters as well as the private and public key:
- the
apiBaseUrlthat you are making requests to (you will use https://api.turnkey.com when making requests to Turnkey's production API) - the
defaultOrganizationIdto make requests on behalf of (you can use the organization ID you saved above).
import { Turnkey } from "@turnkey/sdk-server";

const turnkey = new Turnkey({
  apiBaseUrl: "https://api.turnkey.com",
  apiPrivateKey: process.env.TURNKEY_API_PRIVATE_KEY,
  apiPublicKey: process.env.TURNKEY_API_PUBLIC_KEY,
  defaultOrganizationId: process.env.TURNKEY_ORGANIZATION_ID
});

const apiClient = turnkey.apiClient();
Create a Wallet
A hierarchical deterministic (HD) Wallet is a collection of cryptographic private/public keypairs that share a common seed. For simplicity, you can think of a wallet as a collection of accounts where each account has a single address associated with it. An address is a string such as 0x7aAE6F67798D1Ea0b8bFB5b64231B2f12049DB5e that you reference when you want to transfer funds to someone.
You can read more about how Turnkey implements wallets in our Wallet guide.
In order to create a wallet you can call createWallet and pass in the name of the wallet, as well as any accounts that you want to derive when creating the wallet. In this example, we will create a new wallet and create a single Ethereum account along with it.
Note: You can always add new accounts to a wallet later using the createWalletAccounts method.
import { DEFAULT_ETHEREUM_ACCOUNTS } from "@turnkey/sdk-server";

const walletResponse = await apiClient.createWallet({
  walletName: "Example Wallet 1",
  accounts: DEFAULT_ETHEREUM_ACCOUNTS
})

const walletId = walletResponse.walletId;
const accountAddress = walletResponse.addresses[0];
You should now be able to see your newly created wallet on your Turnkey dashboard in the Wallets section.
Sign a Transaction
A Turnkey client can be used as a signer alongside many popular web3 libraries. You can see the full list of supported web3 integrations here. In this example, we will use Turnkey's Ethers.js wrapper to sign and broadcast a transaction. Note that we also support Viem.
- Yarn
- NPM
yarn add ethers
yarn add @turnkey/ethers
npm install ethers
npm install @turnkey/ethers
import { ethers } from "ethers";
import { TurnkeySigner } from "@turnkey/ethers";

const turnkeySigner = new TurnkeySigner({
  client: apiClient,
  organizationId: process.env.TURNKEY_ORGANIZATION_ID,
  signWith: accountAddress
})

// a provider is required if you want to interact with the live network,
// i.e. broadcast transactions, fetch gas prices, etc.
const provider = new ethers.JsonRpcProvider(<provider API URL>);
const connectedSigner = turnkeySigner.connect(provider);

const transactionRequest = {
  to: <destination address>,
  value: ethers.parseEther(<amount to send>),
  type: 2
}
const transactionResult = await connectedSigner.sendTransaction(transactionRequest);
And that's it, you have sent your first Ethereum transaction without ever having to manage private key material on your own server!
Sending transactions this way provides a much stronger security model than managing key material directly on your own servers, but the real power of Turnkey comes from its extensibility. In the next section we will show you how to create fully non-custodial wallets on behalf of your users, where users can sign transactions themselves using passkeys.
Create a Non-Custodial Wallet for a User
The following example will walk you through a simple flow for having a user create a wallet as a configurable subOrganization of your parent Turnkey organization. This gives you full control of the policies and access controls associated with the wallet when it's created.
For a more comprehensive breakdown of all our embedded wallet flows you can read our Embedded Wallets Guide.
Instantiate Turnkey using the Browser SDK
Turnkey offers a browser SDK which includes utilities for leveraging native browser APIs in addition to facilitating calls to Turnkey's API. These utilities enable the creation and management of user passkeys and the storage of user login sessions among other things.
Installation
- Yarn
- NPM
yarn add @turnkey/sdk-browser
npm install @turnkey/sdk-browser
Initialize a passkeyClient
import { Turnkey } from "@turnkey/sdk-browser";

const turnkey = new Turnkey({
  apiBaseUrl: "https://api.turnkey.com",
  defaultOrganizationId: process.env.TURNKEY_ORGANIZATION_ID
})

const passkeyClient = turnkey.passkeyClient();
Create a Local Passkey Credential
This will prompt a user natively in their browser to create a passkey.
const credential = await passkeyClient.createUserPasskey({
  publicKey: {
    user: {
      name: <userName>,
      displayName: <userDisplayName>
    }
  }
})

// now, you can specify this credential when you create a sub-organization below
Configure the subOrganization for the User
In this example flow, you are creating a segregated subOrganization for each end-user. Each subOrganization can have it's own policies associated with it. The subOrganization can be configured in any way, including shared custodial setups that require multisig schemes to execute. In this example config, you are creating a wallet where only the end-user has the ability to approve signing, with the passkey credential they created above.
import { DEFAULT_ETHEREUM_ACCOUNTS } from "@turnkey/sdk-server";

// receive posted credential

const subOrganizationConfig = {
  subOrganizationName: <subOrganizationName>,
  rootUsers: [{
    userName: <userName>,
    userEmail: <userEmail>,
    apiKeys: [],
    authenticators: [
      {
        authenticatorName: <authenticatorName>,
        challenge: credential.challenge,
        attestation: credential.attestation
      }
    ],
    oauthProviders: []
  }],
  rootQuorumThreshold: 1,
  wallet: {
    walletName: <initialWalletName>,
    accounts: DEFAULT_ETHEREUM_ACCOUNTS
  }
}
Call createSubOrganization from your apiClient
The call to createSubOrganization must ultimately be done using the parent organization credentials, which is why we make the call from the server-side apiClient.
const subOrganizationResponse = await apiClient.createSubOrganization(subOrganizationConfig);
Make user requests
Once the subOrganization has been created, all future activities on that subOrganization can be authenticated from the end-user's passkey credential, and performed directly from the passkeyClient in the browser SDK. A user could authenticate the call to create another wallet on their account with the following code.
const walletResponse = await passkeyClient.createWallet({
  walletName: "Wallet Created with User Authentication",
  accounts: DEFAULT_ETHEREUM_ACCOUNTS
});

const walletId = walletResponse.walletId;
const accountAddress = walletResponse.addresses[0];
Sign a Transaction
import { ethers } from "ethers";
import { TurnkeySigner } from "@turnkey/ethers";

const turnkeySigner = new TurnkeySigner({
  client: passkeyClient,
  organizationId: process.env.TURNKEY_ORGANIZATION_ID,
  signWith: accountAddress
})

// a provider is required if you want to interact with the live network,
// i.e. broadcast transactions, fetch gas prices, etc.
const provider = new ethers.JsonRpcProvider(<provider API URL>);
const connectedSigner = turnkeySigner.connect(provider);

const transactionRequest = {
  to: <destination address>,
  value: ethers.parseEther(<amount to send>),
  type: 2
}
const transactionResult = await connectedSigner.sendTransaction(transactionRequest);
Login a User
Whenever you call a method on passkeySigner the browser will prompt the end-user for a passkey signature to use as an authentication credential for the request to Turnkey's API. This is good when used for stateful write actions to their subOrganization, but a bit cumbersome when used for reading data from their account. In order to make this UX feel more streamlined, the browser SDK offers a way to login a user and then subsequently make read-only requests to Turnkey's API via a login session instead of needing an end-user to tap a passkey each time.
const response = await passkeyClient.login();
if (response.organizationId) {
  // user is authenticated with Turnkey
} else {
  // user was not authenticated with Turnkey
}
Once a user has been logged in, you will have access to the currentUserSession to call Turnkey's API. The following example will return a list of wallets for the logged-in user.
const currentUserSession = await turnkey.currentUserSession();

if (currentUserSession) {
  // this request will not require the user to tap a passkey
  const walletsResponse = await currentUserSession.getWallets();
  const allUserWallets = walletsResponse.wallets;
}
Next Steps and Examples
In addition to programmatic transaction signing, and embedded wallet passkey flows, Turnkey also allows ways for users to authenticate with email and recover lost accounts, create specific policies around transaction execution, and much much more.
- Check out our examples to see what can be built.
- Learn more about Organizations and Wallets.
- See our API design or dive into our API reference.